> For the complete documentation index, see [llms.txt](https://docs.emobiq.com/llms.txt). Markdown versions of documentation pages are available by appending `.md` to page URLs; this page is available as [Markdown](https://docs.emobiq.com/emobiq-ai/readme/debug-agent/adding-context.md).

# Adding Context

The Debug Agent is designed to understand your app and select the most relevant files automatically. Adding context is an optional but powerful way to be more deliberate by pointing the AI to exactly the files, API endpoints, or plugin functions you have in mind when you already know what you need.

There are **three types of context** you can add, each with a quick keyboard shortcut and a point-and-click alternative:

| What you want to reference | Shortcut | UI method                              |
| -------------------------- | -------- | -------------------------------------- |
| A file in your project     | `/`      | Right-click file → **Refer this file** |
| An API endpoint            | `#`      | External API icon → **Reference**      |
| A plugin function          | `@`      | Plugin icon → **Reference**            |

***

## 1) Referencing Files — `/`

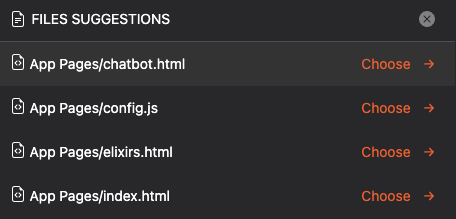
Use `/` to point the Debug Agent to a specific file in your project. This is useful when you want to be precise about which page or script should be edited.

**How to use**

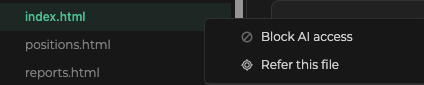
<table data-card-size="large" data-view="cards"><thead><tr><th></th><th data-hidden data-card-cover data-type="image">Cover image</th></tr></thead><tbody><tr><td>Type <code>/</code> in the prompt box. A file list appears, then start typing to filter and select the file you want to reference.</td><td data-object-fit="contain"><a href="/files/bZnKJEH8tPEcvkj8jgHb">/files/bZnKJEH8tPEcvkj8jgHb</a></td></tr><tr><td>Prefer clicking? Right-click any file in the project directory and select <strong>Refer this file</strong>. It gets added to your prompt automatically.</td><td data-object-fit="contain"><a href="/files/NGeoggqheoQT01vaQClo">/files/NGeoggqheoQT01vaQClo</a></td></tr></tbody></table>

***

## 2) Referencing API Endpoints — `#`

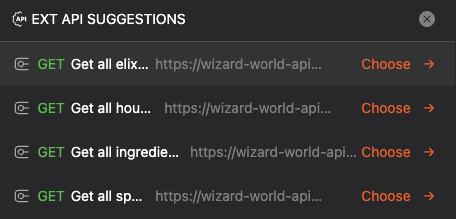
Use `#` to reference a specific API endpoint from your External API integrations. This is helpful when you want the AI to use a particular endpoint for a feature you're building.

**How to use**

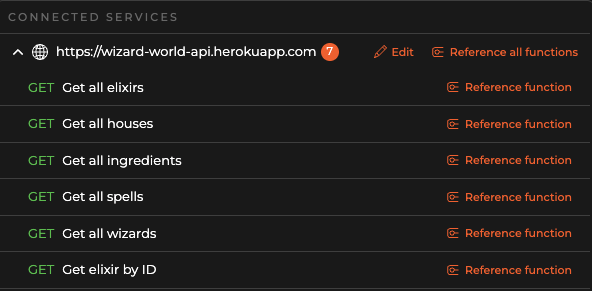
<table data-card-size="large" data-view="cards"><thead><tr><th></th><th data-hidden data-card-cover data-type="image">Cover image</th></tr></thead><tbody><tr><td>Type <code>#</code> in the prompt box. A list of your registered API endpoints appears and select the one you need.</td><td data-object-fit="contain"><a href="/files/GUZ1erpVrWbFsN2dA8zC">/files/GUZ1erpVrWbFsN2dA8zC</a></td></tr><tr><td>Click the <strong>External API icon</strong> in the debug agent toolbar. Click <strong>Reference</strong> next to individual endpoints, or use <strong>Reference all</strong> if you want to include everything.</td><td data-object-fit="contain"><a href="/files/Ge82xQiT3LKhy44V6AAc">/files/Ge82xQiT3LKhy44V6AAc</a></td></tr></tbody></table>

{% hint style="info" %}
Not sure which endpoint to pick? Use **Reference all** and the AI will determine which ones are relevant to your request.
{% endhint %}

***

## 3) Referencing Plugins — `@`

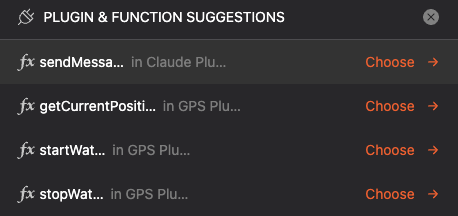
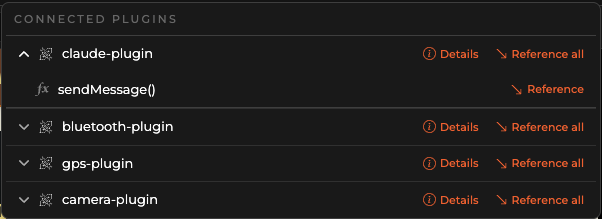
Use `@` to reference a specific plugin function. This is useful when you want to call a particular function from a plugin already added to your project.

**How to use**

<table data-card-size="large" data-view="cards"><thead><tr><th></th><th data-hidden data-card-cover data-type="image">Cover image</th></tr></thead><tbody><tr><td>Type <code>@</code> in the prompt box. A list of available plugin functions appears then select the one you want the AI to use.</td><td data-object-fit="contain"><a href="/files/44YfD3nwM4KWYeyk2NjM">/files/44YfD3nwM4KWYeyk2NjM</a></td></tr><tr><td>Click the <strong>Plugin icon</strong> at the top right of the preview panel. Click <strong>Reference</strong> on individual functions, or <strong>Reference all</strong> to include everything in one go.</td><td data-object-fit="contain"><a href="/files/UZMnzE68gR7YMHUPKLTP">/files/UZMnzE68gR7YMHUPKLTP</a></td></tr></tbody></table>

***

## Putting it all together

You can combine all three in a single prompt when you want to be specific about the file, endpoint, and plugin function involved.

{% code title="Example: A prompt using all three context types" %}

```
On the /camera.html page, add a "Take Photo" button that calls @Camera Plugin - takePicture.
After the photo is taken, upload it using #POST /uploads and display a success message.
```

{% endcode %}